Forensic Fortress - Shmoocon 2020
Hack Fortress: Forensic Challenges
This past Shmoocon, the Hack Fortress group returned to deliver another action pack day of Team Fortress 2 and hacking. As previously discussed, Hack Fortress is a combination of a First Person Shooter (Team Fortress 2) and a jeopardy style CTF. Teams of ten are assembled with six gamers and four hackers in a single-elimination bracket. Hackers solve challenges and unlock points to buy in-game items for gamers. All of this occurs in a 30 minute round, therefore challenges must be of reasonable difficulty.
Disk Based Forensic Challenges
Hack Fortress has previously had disk forensic challenges where you’re given an image and has to perform some task to identify the flag. Perhaps there are several files and you have to perform some complicated regex search to identify said flag. However, there was little to no challenges related to physically imaging a device to perform the task. This year we presented two challenges to perform simple disk imaging for forensic focused challenges. The first two challenges have stand -alone scripts to automatically generate images. This was made for individuals who wish to try this at home, or are just getting into the field and don’t quite know where to start/make an image.
Lost Files - Disk Challenge 1
During round - 1 of Hack Fortress teams were given a 16GB USB-3 drive with a challenge description of “I’ve lost my files, can you help me find them?”. If you plugged in and mounted the USB you would have found an exFAT file system with a base directory structure but no actual files. Those who chose to ask for a hint were told to “look beyond the file system” as there were many bytes not being used by the file system partitions. This leads us to imaging the disk.
Imaging The Disk
After unmounting the disk, you can begin imaging by executing the following
command: dd if=/dev/sdx of=/tmp/challenge-1.img bs=4M. Once the imaging
completes, you will have a nice image blob on your filesystem that you can begin
to forensically slice and dice.
Executing file on the image comes back with DOS/MBR boot sector. That seems odd, right? Well, this is actually the magic bytes for
exFAT. Performing a hexdump of the first 10 lines presents us with an indicator
for the exFAT filesystem.
00000000: eb76 9045 5846 4154 2020 2000 0000 0000  .v.EXFAT   .....
00000010: 0000 0000 0000 0000 0000 0000 0000 0000  ................
00000020: 0000 0000 0000 0000 0000 0000 0000 0000  ................
00000030: 0000 0000 0000 0000 0000 0000 0000 0000  ................
00000040: 0000 0000 0000 0000 c2eb 0b00 0000 0000  ................
00000050: 8000 0000 8000 0000 0001 0000 ab2f 0000  ............./..
00000060: 0400 0000 2fbd 5ce0 0001 0000 0906 0180  ..../.\.........
00000070: 0000 0000 0000 0000 0000 0000 0000 0000  ................
00000080: 0000 0000 0000 0000 0000 0000 0000 0000  ................
00000090: 0000 0000 0000 0000 0000 0000 0000 0000  ................
Now it’s possible to start slicing and dicing the blob.
Carving Out Files
The process of searching and recovering files within disk images is called carving. Typically carving tools will look for file headers to identify images, documents, etc… and their offset within a binary blob. Searching sequentially through a disk image can take a significant amount of time depending on how large the disk is. In real-world scenarios data may not be in contiguous but rather fragmented throughout the disk. Fragmented files greatly increase the difficulty of recovery data However in this scenario it is not anything to worry about.
Given time is the largest constraint at Hack Fortress, the 16GB drive was identified as a reasonable size for competitors. Some open-source tools perform file carving tasks include foremost, scalpel, binwalk, and this blog’s favorite utility, r2.
Simply executing binwalk challenge-1.img will give you offsets and what
files have been identified based on magic numbers.
However, these tools can also lie to you! Understanding what the signature is that hit while carving files will assist in building context to solving challenges. A great example of a false positive is radare2’s magic number identifier for PE files. It simply hits on the bytes “MZ” assuming it’s a legitimate MZ header.
[0x17ceec00]> /m ; # This starts the magic header search
0x0000e5d2 1 MS-DOS executable # BOOM! MS-DOS executable identified
[0x17ceec00]> s 0x0000e5d2 # This searches to the offset where the header was
identified.
[0x0000e5d2]> px # Dump some hex
- offset -   0 1  2 3  4 5  6 7  8 9  A B  C D  E F  0123456789ABCDEF
0x0000e5d2  4d5a d18b 46bf 5a4e c568 965b 462a fd94  MZ..F.ZN.h.[F*..
0x0000e5e2  03da 61ff a5ec bb25 e297 a673 71ed beaa  ..a....%...sq...
0x0000e5f2  85ad 0016 1cec daeb ce41 61d5 1713 b6fc  .........Aa.....
0x0000e602  456a 6a29 09a5 70cf 6942 ed02 d51c 02e2  E
With that out of the way, let’s take a look at the binwalk output below on the imaged USB drive.
DECIMAL       HEXADECIMAL     DESCRIPTION
--------------------------------------------------------------------------------
17507204      0x10B2384       gzip compressed data, last modified: 1978-11-24
06:55:27 (bogus date)
24999360      0x17D75C0       PNG image, 1269 x 1638, 8-bit/color RGBA,
non-interlaced
24999424      0x17D7600       Zlib compressed data, best compression
25009296      0x17D9C90       Zlib compressed data, default compression
25009742      0x17D9E4E       Zlib compressed data, best compression
87843812      0x53C63E4       MySQL ISAM compressed data file Version 6
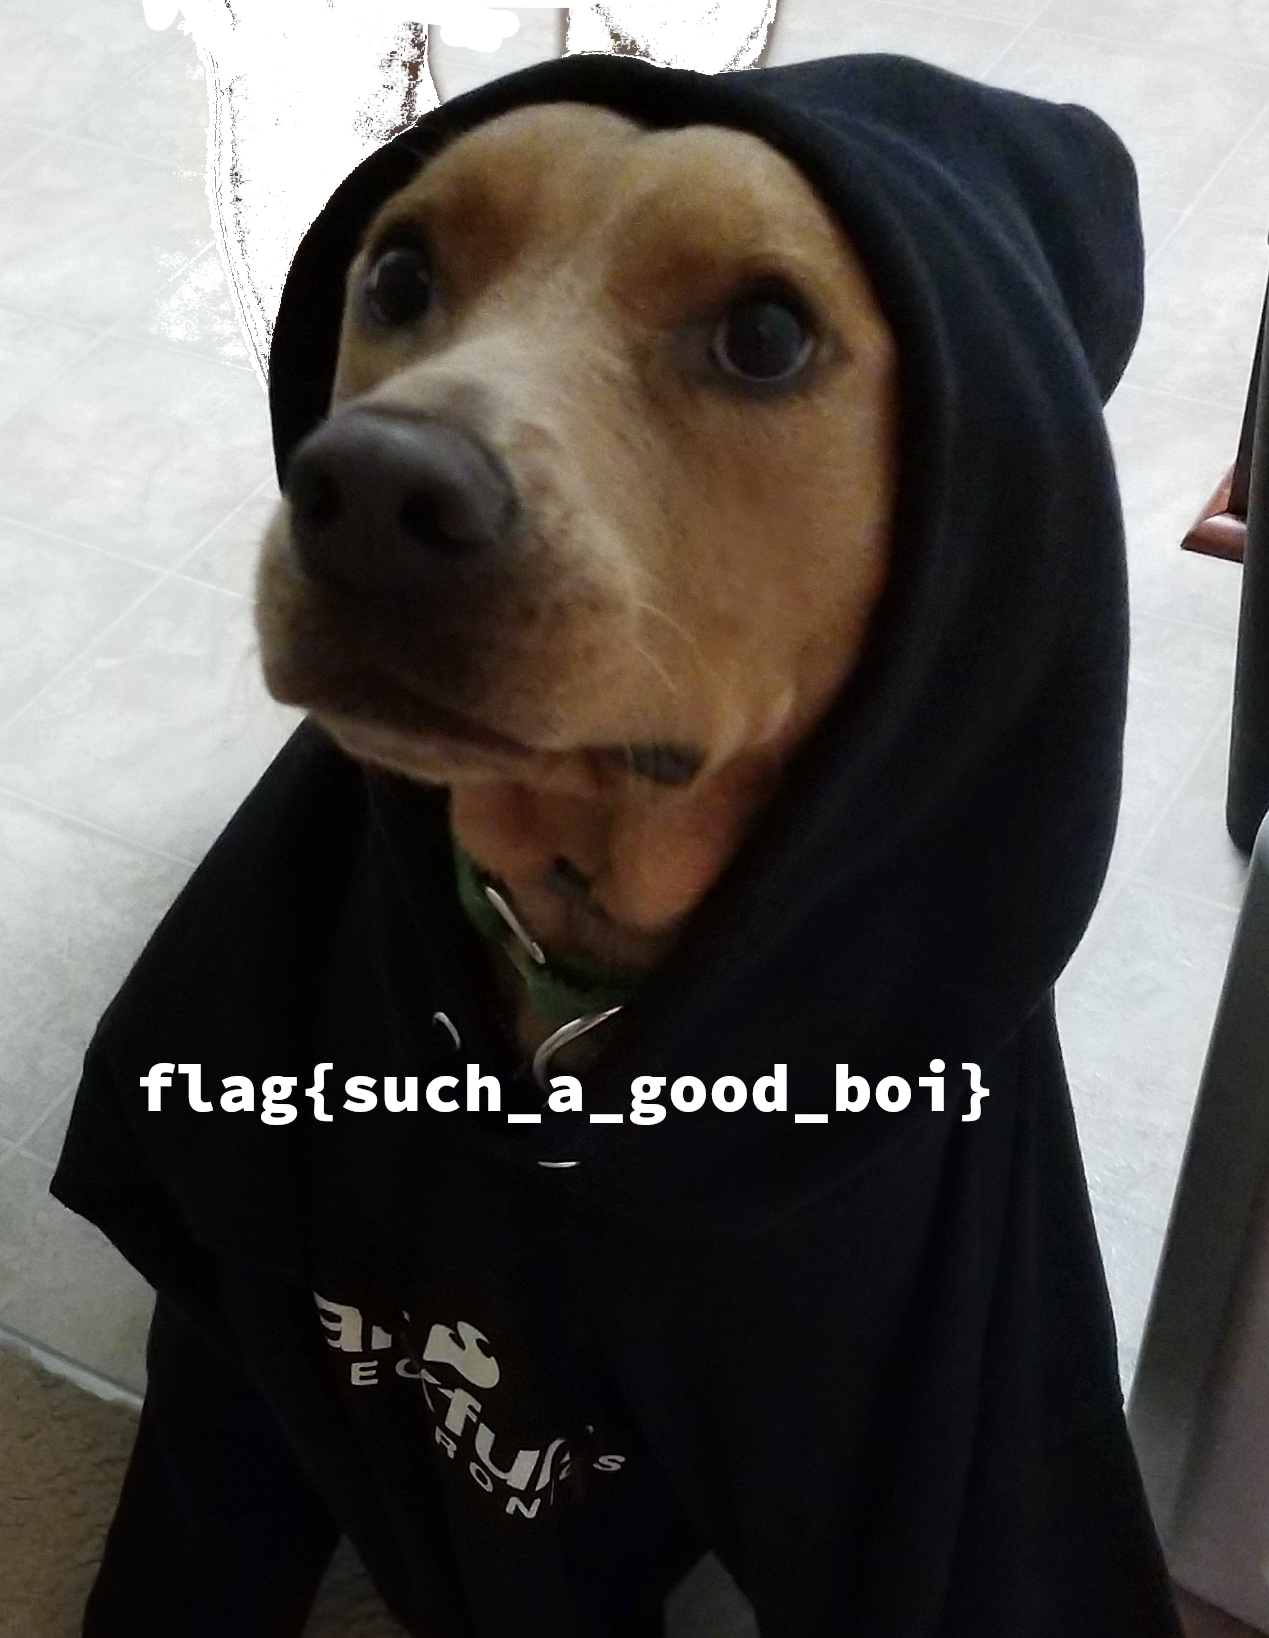
The second item listed with binwalk appears to be a PNG file. To extract this
automatically with binwalk, simply add the -e flag. After executing binwalk -e blob.img
The image will be found in the extracted folder output and you’ll have the first
flag!
Armed with basic file carving knowledge and the internet, you could look up the file format of a particular challenge you are working on to be able to start the painstaking process of analyzing the hex dump in the event fragmentation, or some other corruption has occurred.
scisnerof-itna - Disk Challenge 2
The second round of the USB challenge, would not be recognized by the operating system when it was initially plugged in. Some individuals thought that this meant the USB was corrupt, but the Hack Fortress team reassured them that this was part of the challenge. Well, what do you do when your operating system cannot read the USB drive? You image the drive as we did back in the first round. After the image has been dropped to disk, we can start examining the image with tools used in challenge-1.
After the imaging completes let’s try what worked for the first disk challenge and run some carver tools. Binwalk provides the following output:
DECIMAL       HEXADECIMAL     DESCRIPTION
--------------------------------------------------------------------------------
29939408      0x1C8D6D0       VMware4 disk image
35149347      0x2185623       Broadcom header, number of sections: 923866577,
104172408     0x6358B78       MySQL ISAM compressed data file Version 8
126638446     0x78C596E       Uncompressed Adobe Flash SWF file, Version 23,
File size (header included) 60351925
174417793     0xA656781       MySQL ISAM index file Version 9
248777956     0xED40CE4       XAR archive, version: 10704, header size: 28739,
TOC compressed: 422810524854542, TOC uncompressed: 165533533479053260
311059477     0x128A6415      Windows Script Encoded Data (screnc.exe)
320255057     0x1316B451      MySQL MISAM compressed data file Version 2
338274237     0x1429A7BD      MySQL ISAM compressed data file Version 7
Hmmm, well that doesn’t look too great. A VMWare4 disk image, a Broadcom header and then there are some MySQL listed files… This, my friends, is an obvious red flag and should make you question the process you’re currently going down. Is it possible for a disk image to have these files? Sure! However, considering the scenario that this challenge was released in Shmoocon with a time limit, it’s unlikely that these files fit the context of the challenge.
At this point, lets manually dump the image and start poking at the hex dump. Looking at the image we start seeing an interesting pattern. Some portions of the hex dump look familiar, but …. reversed? The hex dump below shows the very last few bytes in the second round challenge.
17d78390: 8001 0609 0000 0100 e05c bd2f 0000 0004  .........\./....
17d783a0: 0000 2fab 0000 0100 0000 0080 0000 0080  ../.............
17d783b0: 0000 0000 000b ebc2 0000 0000 0000 0000  ................
17d783c0: 0000 0000 0000 0000 0000 0000 0000 0000  ................
17d783d0: 0000 0000 0000 0000 0000 0000 0000 0000  ................
17d783e0: 0000 0000 0000 0000 0000 0000 0000 0000  ................
17d783f0: 0000 0000 0020 2020 5441 4658 4590 76eb  .....   TAFXE.v.
Comparing this hex output to the original drive imaged in the first challenge, you will identify that the hex has been reversed. This was a reverse ext4 file system images onto the device. Simply reading in the disk, reversing and dumping the bytes will lead to simply being able to identify the flag. This can be accomplished with the following Python snippet.
#!/usr/bin/python3
fh = open("Block_dev.img", "r+b")
fh.seek(0)
all_data = fh.read()

fh = open("fwd.img", "w+b")
fh.write(all_data[::-1])
This challenge is a great example of when you should use a hint at Hack Fortress. All too often the hacking teams work independently and don’t ask the judges for any assistance. The hints don’t carry over from round to round and there’s NO PENALTY for using them. If you’re reading this considering participating in an upcoming Hack Fortress, the advice I have for you is to use the hints, get the points, and win the round!

Note, the hint for this challenge is to reverse the title. This takes us to “anti-forensics”.
Who’s Process Is It Anyway? - ProcMon
And now time for something completely different. The challenge “Who’s Process Is It Anyway?” was given to competitors with the description of “A hacker migrated from one process to another, find the process the hacker migrated into.”. Before diving further, if you’re interested in what this process looks like I suggest taking a look here.
The user is given a Process Monitor (ProcMon) If you’ve never used ProcMon before, it’s a System Internals tool that tracks a significant amount of events occurring on a Windows system. This allows great insight into what exactly process are doing on a Windows system from a file system, registry, process/thread point of view.
Re-examining the statement at hand competitors have to do the following:
- Find the process that was used for initial access.
- Identify the process that was migrated into.
While this sounds simple enough, the amount of data provided by ProcMon can be
overwhelming if proper filters are not being applied. Simply opening the ProcMon capture,
the competitor is presented with 358,141 events. How can one know what to look
for?
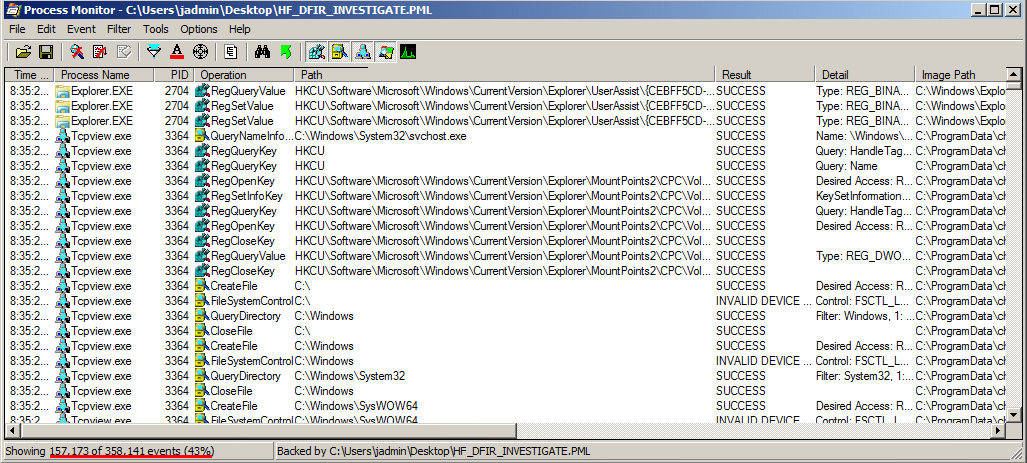
Instead of blindly tracking down processes, analyzing outbound TCP connections could potentially aid in identifying the C2 host and then the processes making these connections. Additionally, strange paths and odd company names can all be factors in identifiying the process the attacker migrated into. The image below shows a great example of a red flag.
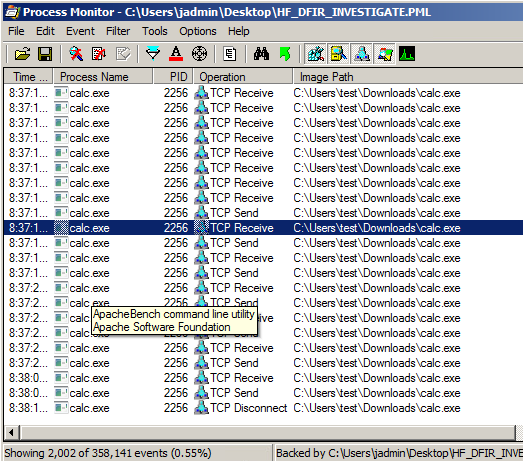
My friends, we see calc.exe with outbound TCP connections running from the user’s downloads folder. To add more fuel to the suspicion, you can see the company name (achieved by adding a column or hovering over the process name with the mouse) is “ApacheBench command line utility”. Those familiar with msfvenom and Metasploit will recognize this as the default company name embedded with created executables.
Filtering further on TCP Connect will enable all outbound connections to
be identified. Highlighted in red below are two processes calling outbound to
the same IP (10.20.20.15) on port 8080.
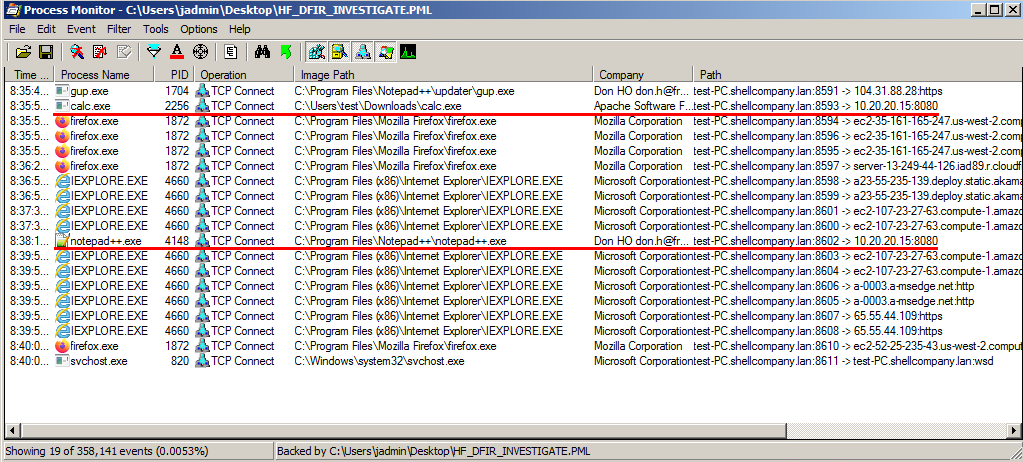 Based on the time alone, you can draw the conclusion that notepad++.exe was the
process the attacker migrated into. You could filter further and actually
view a thread kick-off to get the exact time. However, this was unnecessary to
complete the challenge. At this point, you have identified the new process and
can submit it to the scoreboard.
Based on the time alone, you can draw the conclusion that notepad++.exe was the
process the attacker migrated into. You could filter further and actually
view a thread kick-off to get the exact time. However, this was unnecessary to
complete the challenge. At this point, you have identified the new process and
can submit it to the scoreboard.
I think it’s important to point out you can convert the PML format to a CSV file. This would allow you to quickly slice and dice the ProcMon format allowing quick insight on the top processes, events, etc…
Beyond The Blog
Dear reader, thank you for taking time to read this! I hope you are inspired to form a team and come to the next Hack Fortress (DEF CON 27). If you’re looking to take a crack at disk imaging challenges, here is a repo with the build scripts.